Client Tutorials
Back to Home
The Client
On-Boarding Process
On-Boarding Process
Step-by-Step tutorial on how the on-boarding process gets triggered, whats included, and how you can make your own changes to it
07:47
On-Boarding Automation Overview
Included with AutoFox, is a pre-design Client On-Boarding process, which involves a Trigger Event, Email & SMS Campaigns and Client Portal Access with instructions on what to do next.
The Basics...
Assigning an Agent will Trigger the On-Boarding Process
Client will get an email introducing their new personal Agent
As well as their Client Portal Login and Password
The email will also provide link to Digitally Sign your Agreement
As well as instructions on how to upload their Required Documents
10 mins later they will get an educational email about "how it works"
Sign the Agreement reminder email / sms will be sent out the next day if they have not done so already
The emails and SMS's are fully editable if you want to make changes
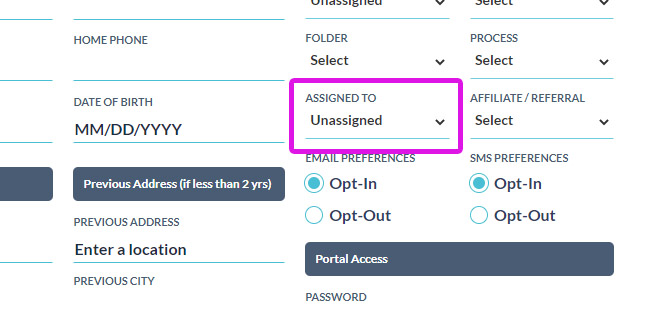
Step 1: Assigning an Agent (this triggers the automation)
Choosing an Agent will trigger the Client On-Boarding Email & SMS Campaign. ONLY assign them when you are ready to start this.

Step 2: Client Receives the First Email & SMS
We have provided pre-design emails for all automations in AutoFox, but you may customize them all you want!

Branding
Your logo will be automatically pulled in. This logo is the SAME logo you uploaded for your Client Portal - see your Admin / Client Portal settings to update it.
The Assigned Agent's name, email and phone number will be displayed in the signature so its personal.
The Assigned Agent's name, email and phone number will be displayed in the signature so its personal.
Customization
There is a full WYSIWYG (What you see is what you get) editor so if you have a web designer or are handy with HTML code, you can make any automated email look exactly how you want. You can add photos, banners, colors to your heart's content.
The email has some Steps for your Client to follow:
All of this is editable if you want to have a different process for your clients

Step 1 - Sign the Agreement
When they click the button, they will have to Digitally Sign the Agreement before they are allowed access to the Client Portal.

Step 2 - Required Documents
Instructions on what type of documents they will need to upload. When they click the button, they will land on a "Required Steps" page to upload them.

Step 3 - Credit Monitoring
Your custom Credit Monitoring Affiliate link will be embedded in this button. To add your Affiliate Link, visit your Admin / Portal Settings.
Here is an Example Email Layout so you get the idea..
Click Here to View an Example Email
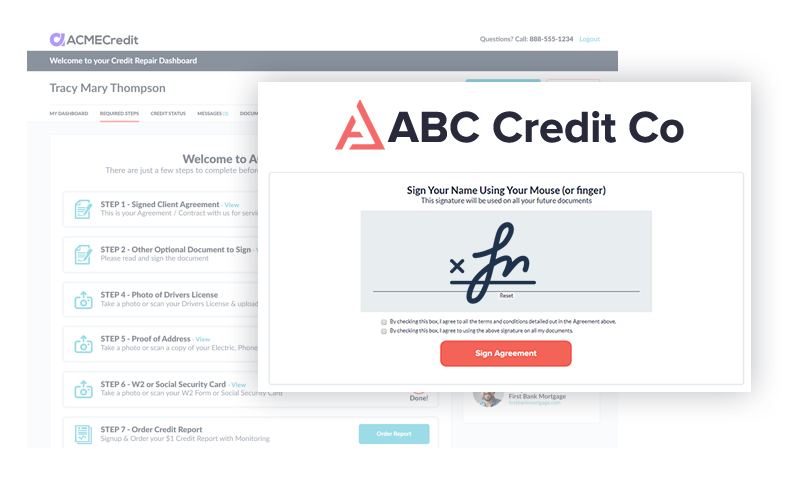
Step 3: Client Signs the Agreement Digitally
Before they can continue into the Client Portal, they sign your Agreement, and their signature will be saved to use on letters later.
If they don't sign it right away....
AutoFox will send reminder emails over the next few days if they have not signed it yet, as well as a notification to YOU when they HAVE signed it so you don't have to keep checking!
Step 4: Client Uploads Required Documents
After they sign the agreement, they are landed on a "Required Steps" page, which has instructions on all the required documents they will need to upload. If they are on mobile, they can simply take photos of their documents to upload them.

Required Steps as follows
Step 1 - Will already be complete as they sign before they get here
Step 2 - Drivers License Photo - Required
Step 3 - Proof of Address - Required
Step 4 - W2 or Social Security Card - Required
Step 5: Credit Monitoring Info
In the initial email, and here, they will be asked to Order their Credit Report (where they use your Credit Monitoring Affiliate Link), and then enter the Login and Password for that monitoring account.

Step 6: The 2nd Automated Email Goes Out
10 mins after the first email & SMS went out with the On-Boarding details, a 2nd email will go out that has some information on how everything works (you can customize this email as well if you like)
Making Changes to the AutoFox Emails / SMS
If you want to customize any of this, you can go to the main AutoFox page and click on the following item..
Client (step 02) - Agent, On-Boarding & Portal Login

Click "Edit", then click on the + sign to open up the steps in that automation
Then just click on the "edit" button where you will see the entire email and can make your changes, save when done.

Same process if you want to edit the 2nd email that goes out
Then just click on the "edit" button where you will see the entire email and can make your changes, save when done.

Whats Next?
Once your client is done uploading all the required documents, you can use their monitoring login information that will automatically be saved in the system, to import their credit report, and generate dispute letters.