Client Tutorials
Back to Home
Assigning an Agent to a Client
Understanding the AutoFox Email / SMS Trigger
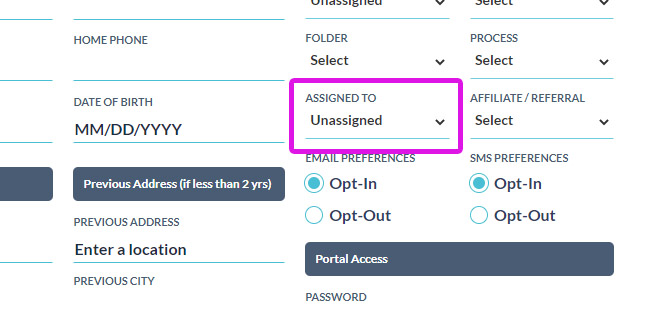
Assigning an Agent (Triggers AutoFox)
This is the most important action when setting up a Client. Choosing an Agent will trigger the Client On-Boarding Email & SMS Campaign. You do not have to assign an Agent when adding a Client, ONLY assign them when you are ready to start the On-Boarding Process.

Automated On-Boarding Includes:
Introduces (the chosen Agent)
Gives Client their Portal Login and Password
Link to Digitally Sign the Agreement (before they are allowed to access the portal)
Instructions on how to upload the Required Documents
Instructions on signing up for Credit Monitoring (with your affiliate link)
You can edit this email by going to the main AutoFox tab, then select: Client (step 02) - Agent, On-Boarding & Portal Login
If you have an SMS package, then they will also get a Welcome SMS Message with instructions
Assigning Clients to Other Agents
If you have large team, you can choose to assign Clients to particular Agents. The action of Assigning an Agent will have that Client now show up in their "My Client" tab on the main Clients list page. This way you can divide up all your Clients evenly among your team.
Just remember, the action of Assigning an Agent WILL trigger the On-Boarding Email / SMS, unless you have the Opt-In turned off for that client.
Just remember, the action of Assigning an Agent WILL trigger the On-Boarding Email / SMS, unless you have the Opt-In turned off for that client.
If you Assign to an Agent:
That Agent will be notified by email that they have been assigned a new client
They will also get a notification inside the software
If you triggered the On-Boarding Email / SMS, they will be introduced as that Client's Personal Agent
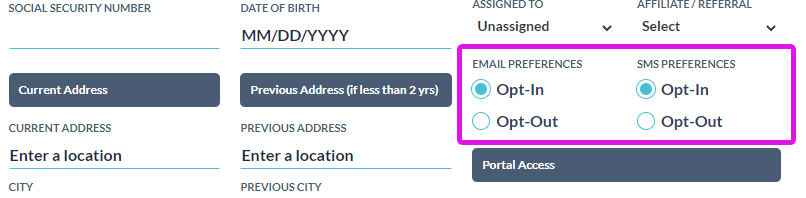
Don't Want to Trigger the Automations?
By default everyone will be "Opted-In" which means they WILL receive Emails and SMS messages, whether they are Automated by the system, or you send out emails manually. To stop a Client from getting any AutoFox sequences, SMS or Emails, turn OFF the Opt-In button.