Client Tutorials
Back to Home
Adding a Client Manually
Step-by-Step tutorial on how to manually enter a new Client, set the Assigned Agent, trigger AutoFox Automations and define statuses
04:14
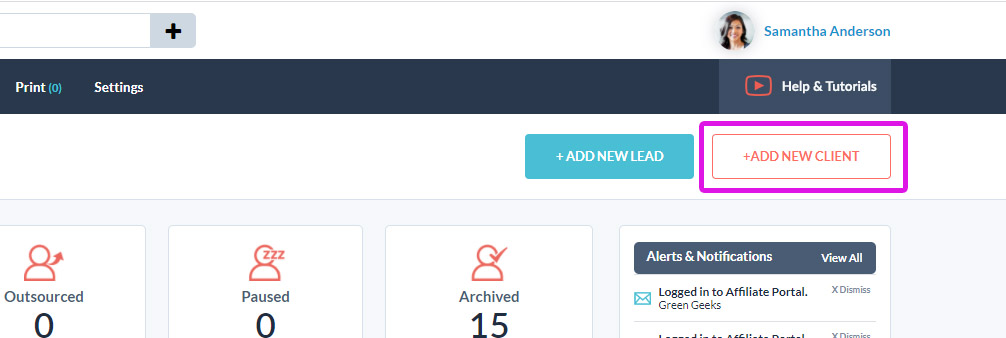
Step 1: Click the "Add New Client" button
Located on the top right of the Dashboard or the Clients Grid

Step 2: Complete all the Contact Info
Enter the Client Name, Email, Phone, Current Address, Previous Address, Social & Date of Birth
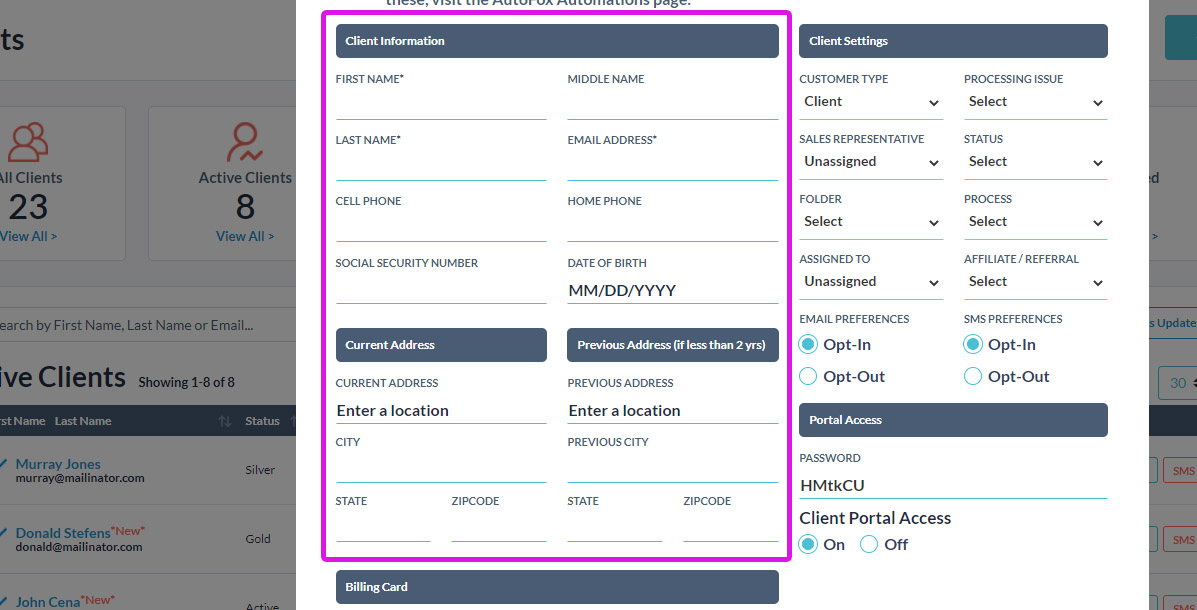
Auto-Complete Address
The address will do a google address lookup as you are typing, so you can quickly select the address and it will fill in the rest for you!
Step 3: Client Settings
The "Customer Type" will be automatically selected
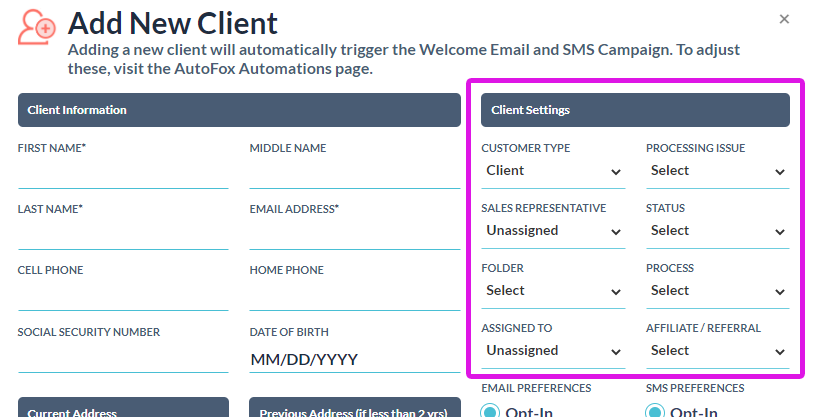
What Each Dropdown is For:
Processing Issue: Internal Status for you to categorize this Client
Sales Rep: add if there is one that needs credit for the sale
Status: for you to organize Clients for reports/searching
Folder: this places them in different sections on the main clients grid page
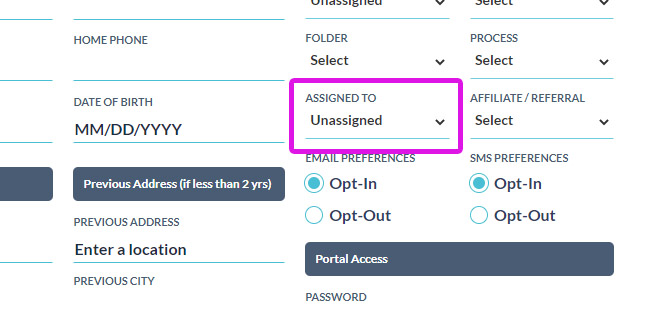
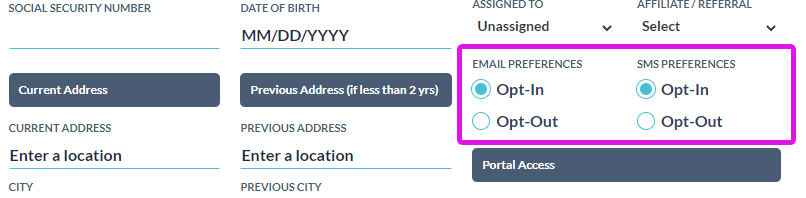
Assigned To: IMPORTANT - select the Agent in charge of this client, which triggers the on-boarding emails
Affiliate / Referral: Select if applicable
Step 4: Assign Agent (Triggers AutoFox)
This is the most important action when setting up a Client. Choosing an Agent will trigger the Client On-Boarding Email & SMS Campaign. You do not have to assign an Agent when adding a Client, ONLY assign them when you are ready to start the On-Boarding Process.
Automated On-Boarding Email Includes:
Introduces (the chosen Agent)
Gives Client their Portal Login and Password
Link to Digitally Sign the Agreement (before they are allowed to access the portal)
Instructions on how to upload the Required Documents
Instructions on signing up for Credit Monitoring (with your affiliate link)
You can edit this email by going to the main AutoFox tab, then select: Client (step 02) - Agent, On-Boarding & Portal Login
If you have an SMS package, then they will also get a Welcome SMS Message with instructions
Step 5: Opt-In Status
By default everyone will be "Opted-In" which means they WILL receive Emails and SMS messages, whether they are Automated by the system, or you send out emails manually. To stop a Client from getting any AutoFox sequences, SMS or Emails, turn OFF the Opt-In button.
Step 6: Client Portal Access
Your client will have their own Client Portal where they can see updated scores, upload required documents and send you messages.
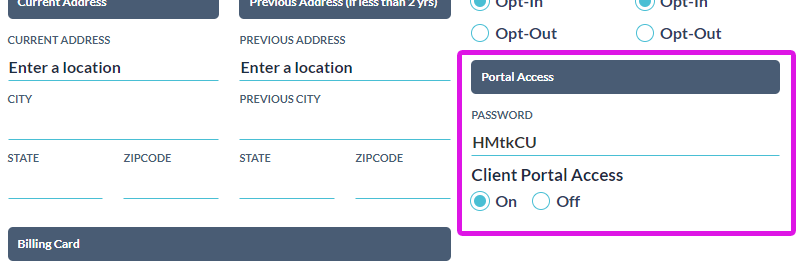
Client Portal Information
Client Portal Access is ON by default (but client will not have their link and login info yet)
Clients will ONLY be able to get their login and password, once you Assign an Agent (which starts the AutoFox On-Boarding)
Passwords will be automatically generated by the system, but you can change it if you want
You can turn OFF access at any time
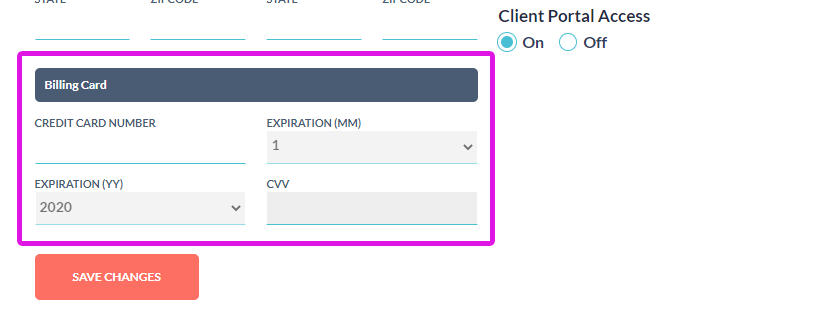
Step 7: Credit Card Details (optional)
If you already have their credit card information, you can enter it here. This ONLY SAVES the information - you will setup their actual billing profile later on in the process. If your Client filled out a Signup Form that asked for their Credit Card Details, then it will automatically be here.
Whats Next?
Now that you have the basic details entered and the Client has their on-boarding email, you can move onto setting up their billing plan or pulling their report.